

Add custom employee attributes
A complete guide to custom (demographic) attributes in CultureMonkey - what they are, why to create them, how to add and manage them, how to populate them from the employee form and imports, and how they power report filters, sub-admin access and anonymity.
On this page
Out of the box, CultureMonkey lets you slice results by the standard dimensions of your organization - team, location, manager, business unit and so on. But every company has dimensions that matter to it specifically: tenure band, job level, work mode, shift, department code, gender, employment type. Custom employee attributes are how you add those dimensions, so you can segment engagement, eNPS and comments the way your organization actually thinks about its people.
This guide covers what custom attributes are and why you'd create them, how to add and manage them, the two field types available, how to populate them from the employee form and from imports, how they become filters and breakdowns in reports, and - importantly - how they interact with anonymity and sub-admin access scoping.
A custom attribute is an employee data field you define yourself, beyond the built-in ones. You create it once in CultureMonkey under General › Employees › Attributes, choose whether it's a free-text or dropdown field, then fill in each employee's value via the employee form or an import. From then on it shows up as a filter and breakdown dimension everywhere results appear - always subject to the anonymity threshold, and only for roles you allow to see it.
What custom attributes are
A custom attribute (sometimes called a demographic attribute or custom field) is a piece of employee data that you define, in addition to the standard fields CultureMonkey ships with. Think of the standard fields - team, location, manager, business unit - as the columns everyone gets. Custom attributes are the extra columns you add because they matter to your organization.
Common examples:
- Tenure band - e.g. 0-1 year, 1-3 years, 3+ years
- Job level / grade - e.g. IC1, Manager, Director
- Work mode - e.g. Remote, Hybrid, On-site
- Department or cost center - where your reporting lines don't map cleanly onto teams
- Gender, generation, or employment type - e.g. Full-time, Contract
Each attribute has a name (what you call it), an optional description, and a type that decides how values are entered. Every employee can then have one value for that attribute - Priya's work mode is Hybrid, Sam's is Remote. Under the hood these live as a reusable list of attributes with a value stored per employee, which is why the same attribute can be filtered, broken down and heat-mapped consistently across every report.
CultureMonkey uses these words more or less interchangeably. A demographic is any dimension you can group by (a custom attribute is one). A segment is a specific slice of that dimension (e.g. Work mode = Remote). When you read "break down by demographic" in a report, custom attributes sit right alongside team and location.
Why create them
The company-wide average is comforting and often misleading. A healthy overall engagement score can hide a struggling cohort - and if the thing that unites that cohort isn't a team or a location, the standard fields will never surface it. Custom attributes let you find those hidden stories.
With well-chosen attributes you can:
- Segment beyond team and location. Compare engagement across tenure bands to see whether new hires feel differently from veterans, or split eNPS by work mode to check whether your remote population is being left behind.
- Diagnose more precisely. When a driver dips, breaking it down by job level or department often tells you who is affected far faster than reading every comment.
- Track fairness and inclusion. Attributes like gender or generation let you check whether the experience is even across groups (always within the anonymity threshold - more below).
- Match your own mental model. If leadership thinks in cost centers or shifts, give them results in those terms rather than forcing everything into the org chart.
A little discipline pays off here. A handful of clean, well-populated attributes with tidy value lists will serve you far better than a sprawl of overlapping fields that are half-empty. Aim for the dimensions you'll genuinely act on.
Field types
When you create an attribute, you choose one of two types. This decides how values are entered and how tidy your breakdowns will be.
| Type | How values are entered | Best for | Example |
|---|---|---|---|
| Dropdown | You define a fixed list of options; each employee is assigned one | Dimensions with a known, finite set of values you want to break results down by | Work mode: Remote / Hybrid / On-site |
| Textbox | Free-text value typed per employee | Identifiers or notes where the set of values is open-ended | Cost center code |
For anything you plan to segment or heat-map by, prefer Dropdown. A fixed option list keeps your breakdowns clean - everyone with Hybrid lands in the same bucket, with no "Hybrid" vs "hybrid " vs "WFH" fragmentation. Textbox is best reserved for free-form identifiers where a controlled list doesn't make sense.
For a dropdown, decide your values up front and keep them coarse enough to be useful. Tenure as four bands (<1yr, 1-3yr, 3-5yr, 5yr+) segments beautifully; tenure as an exact hire date fragments into hundreds of one-person groups that anonymity will simply hide. Bucket first.
Create a custom attribute
You manage attributes from the General area, under Employees.
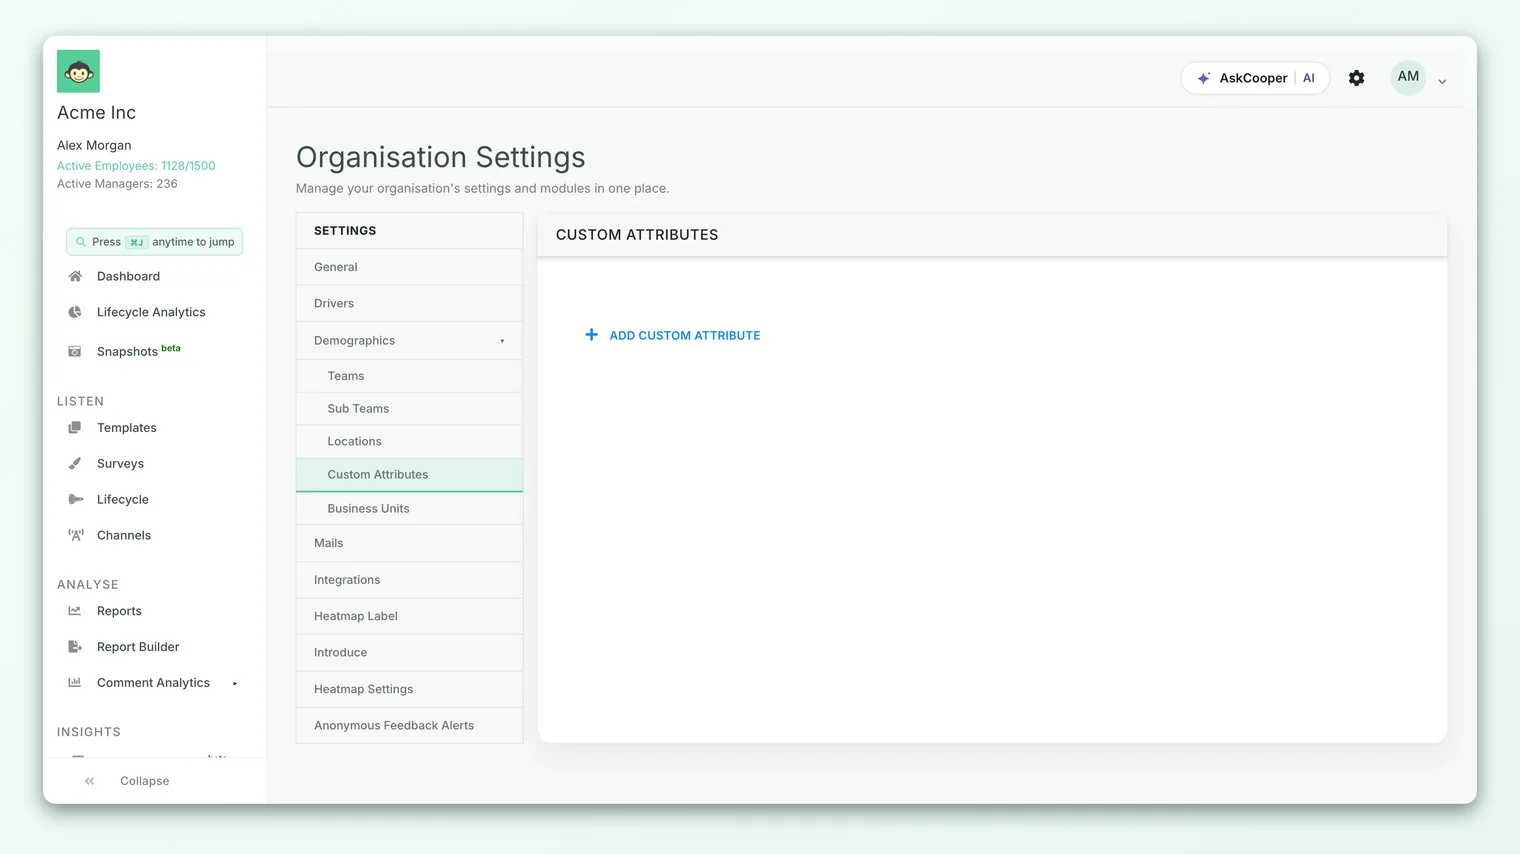
- 1Open the attributes list. Go to General › Employees › Attributes. You'll see every custom attribute already defined for your account, with its type.
- 2Add a new attribute. Click New (or Add attribute) to open the create form.
- 3Name it clearly. Give it a short, unambiguous name - this label appears in every filter and breakdown, so Work mode beats WM2. Add an optional description to remind future admins what it's for.
- 4Choose the type. Pick Dropdown or Textbox. For a dropdown, enter the list of options you want people assigned to.
- 5Save. The attribute is created immediately and becomes available on the employee form and in imports. It won't appear as a report breakdown until enough employees have a value (see anonymity, below).
Manage existing attributes
From the attributes list you can edit an attribute to rename it, adjust its description, or change a dropdown's option list; and you can delete one you no longer need. A few things to keep in mind:
- Editing an option list is safe, but be deliberate. Renaming a dropdown option doesn't automatically re-bucket employees already assigned the old value - you may need to reassign them (via the employee form or an import) so everyone lands in the intended group.
- Deleting an attribute removes it as a breakdown dimension. Historical results that were already displayed stand, but the attribute stops appearing in new filters. Delete only fields you're sure you won't want to slice by again.
- You can control display order. CultureMonkey lets you set a custom order for an attribute's values (rather than plain alphabetical), which is handy for ordered bands like tenure or seniority so IC1 → IC2 → Manager reads in the right sequence in reports and heatmaps.
- You can hide an attribute from certain roles. Each attribute can be shown or hidden per role (sub-admin, manager) independently - covered in the sub-admin section below.
Populate attribute values
Creating an attribute gives you an empty column; you still need to fill in each employee's value. There are two ways to do that.
From the employee form
When you add or edit an individual employee, their custom attributes appear as fields on the profile form alongside the standard ones. Set the value - pick from the dropdown, or type into the textbox - and save. This is ideal for one-off corrections and for new joiners you add by hand. See Add employees for the full employee form.
Via import
For anything beyond a handful of people, populate attributes in bulk through an employee import (CSV or an HRIS sync). Custom attributes are just extra columns in your import file. In a CSV, a custom-attribute column is identified by a cf_ prefix on the header - for example cf_Work mode or cf_Grade - so CultureMonkey knows to route it to the matching attribute rather than a standard field. During import, each value is validated against the attribute's type and (for dropdowns) its allowed options; rows with a value that doesn't match are flagged in the import's error report so you can fix and re-upload.
- 1Create the attributes first. The attribute has to exist before an import can fill it, so define your fields in Attributes before uploading.
- 2Add a column per attribute. In your CSV, add one column per custom attribute using the
cf_prefix (e.g.cf_Tenure band). - 3Match your dropdown values exactly. For dropdown attributes, the values in the file must match the options you defined - mismatches are rejected as errors.
- 4Map and import. Upload the file and confirm the field mapping, then run the import. See Map employee import fields for how mapping works, and Add employees for imports in general.
An attribute only becomes a useful breakdown when enough employees have a value for it. If you roll out a new attribute, aim to backfill it for your existing workforce in one import rather than drip-filling it - otherwise most segments will sit below the anonymity threshold and stay hidden.
Filter and break down reports
This is where custom attributes earn their keep. Once populated, an attribute behaves just like a standard demographic everywhere results are shown.
- As a filter. Narrow any report or dashboard to a segment - Work mode = Remote, Job level = Manager - on its own or combined with other filters. See Filter reports by demographic.
- As a breakdown. Split a score across an attribute's values to compare them side by side - engagement by tenure band, eNPS by department - including in heatmaps, where your custom value order is respected.
- In exports and the Report Builder. Custom attributes are available as breakdown dimensions when you build and export tailored reports.
A worked example
Say you create a Work mode dropdown with Remote, Hybrid and On-site, and populate it via import. In your next survey report you break eNPS down by Work mode:
| Work mode | eNPS | What it tells you |
|---|---|---|
| On-site | +41 | Strong advocacy in the office cohort |
| Hybrid | +33 | Healthy, roughly in line with the company |
| Remote | +12 | A clear gap worth investigating |
The company-wide eNPS might be a comfortable +30 - but the breakdown reveals your remote population is having a materially different experience. Without the custom attribute, that story stays buried in the average.
Anonymity and custom attributes
Custom attributes are subject to exactly the same anonymity protection as every other dimension. Slicing by a custom field never lets you see individual answers, and it never exposes a group that's too small.
Two protections matter here:
- Small values are hidden. A custom attribute value only appears as a breakdown once enough employees carry it (a small minimum, commonly around 3). A dropdown option assigned to just one or two people won't surface as its own segment - which is exactly why coarse bands beat granular ones.
- Small combinations are hidden too. Stacking filters - Remote and IC1 and London - can shrink a group to a handful of people even when each filter alone is large. CultureMonkey hides any combination that falls below the threshold, on screen and in exports.
The finer you slice, the more likely a segment drops below the threshold and disappears. That's the protection working as intended - not a bug. Favor a few well-bucketed dropdowns (four tenure bands, three work modes) over highly granular fields, and you'll get segments that are both meaningful and visible. If a breakdown looks empty, see Why can't I see results yet?.
Custom attributes and sub-admin access
Custom attributes do double duty: they're not just report dimensions, they're also part of how you scope what a sub-admin can see. There are two distinct controls.
1. Hide an attribute from a role. Each attribute can be shown or hidden per role, independently for sub-admins and managers. If a field like Gender should exist for account-level analysis but not be visible to divisional sub-admins, hide it for the sub-admin role - it stays a breakdown dimension for you, but disappears from their filters entirely.
2. Scope a sub-admin to specific attribute values. Beyond hiding a field, you can restrict a sub-admin so they only see employees who match certain attribute values - for instance, limiting an HR business partner to employees where Department = Sales. When this is enabled for your account, you pick the attribute and the value(s) that define each sub-admin's slice; the sub-admin then sees results only for the employees who fall inside it. You can also choose an "All (includes unassigned)" option so employees who don't yet have a value for that attribute aren't accidentally locked out of a scope.
Restricting sub-admins by custom-attribute value is controlled by an account setting and may not be enabled by default. If you don't see the option when configuring a sub-admin, ask your CultureMonkey contact to enable it. Per-role visibility (hiding an attribute) is available independently. See Understanding roles.
Together these give you fine control: a regional sub-admin can be scoped to their own population and prevented from seeing sensitive dimensions, all through the same custom-attribute system that powers your reports.
Best practices
- Bucket, don't itemize. Prefer coarse dropdown bands over exact values so segments stay above the anonymity threshold.
- Name for the reader. The attribute name shows in every filter - make it self-explanatory.
- Populate in bulk. Backfill new attributes for your whole workforce in one import so breakdowns light up immediately.
- Prefer dropdowns for anything you segment by. Free-text fragments; fixed options aggregate cleanly.
- Review periodically. Retire attributes you never filter by; keep the list lean and trustworthy.
- Mind sensitive fields. For attributes like gender, decide deliberately which roles should see them, and lean on anonymity to protect small groups.
Frequently asked questions
What's the difference between a custom attribute and a standard demographic?
Standard demographics (team, location, manager, business unit) are built in and often tied to your org hierarchy. Custom attributes are fields you define for dimensions unique to your organization. In reports they behave identically - both are filters and breakdown dimensions, both respect anonymity.
How many custom attributes can I create?
There's no small fixed cap, but more isn't better. Every attribute you add is another field to keep populated and another dimension to maintain. A focused set of fields you'll actually act on beats a long list of half-filled ones.
Why doesn't my new attribute appear as a breakdown yet?
Almost always because too few employees have a value for it. CultureMonkey only surfaces an attribute value once enough people carry it (around three), so a freshly created field stays hidden until you populate it across your workforce - ideally via a single import.
Can I change a dropdown's options later?
Yes - edit the attribute and adjust the option list. But renaming or removing an option doesn't automatically re-bucket employees already assigned the old value; reassign them (via the form or an import) so everyone lands in the right group.
Can managers and sub-admins see every custom attribute?
Not necessarily. CultureMonkey lets you hide each attribute per role, so you can keep a field visible to account admins while hiding it from sub-admins or managers. Sub-admins can additionally be scoped to see only employees matching specific attribute values, when that account setting is enabled.
Can I filter reports by a free-text (textbox) attribute?
You can, but textbox values fragment easily, so breakdowns are messy and more likely to fall below the anonymity threshold. If you plan to segment by a field, make it a dropdown with a controlled option list instead.
Where to go next
- Add people and set their values: Add employees
- Slice results by your new fields: Filter reports by demographic
- Populate attributes in bulk: Map employee import fields
- Understand role scoping: Understanding roles
- A breakdown looks empty? Why can't I see results yet?
Your feedback helps us improve the Help Center.