

Add and manage office locations
How to set up office locations in CultureMonkey, assign employees to them individually or via import, and use location as a demographic to segment engagement, eNPS and participation by geography.
On this page
Locations are how CultureMonkey groups your people by where they work - a head office, a regional hub, a distribution center, or a "Remote" bucket for people with no fixed site. Once your employees are assigned to locations, every score in the platform can be sliced by geography, so you can ask not just "how engaged is the company?" but "how engaged is the Chennai office compared with London?"
This guide is for account admins setting up and maintaining the location list. It covers what locations are and why they're worth getting right, how to create, edit and delete them, how to assign employees (one at a time and in bulk), how location shows up as a filter in your reports, and a few things to watch for when you operate across regions.
A location is a named place of work - with an optional Region, Country, State and City - that you assign employees to. Set them up under Settings › Locations, assign people individually on the employee form or in bulk via the location_name column of a CSV import, and location instantly becomes a filter and breakdown dimension across CultureMonkey dashboards, reports and participation.
What a location is
A location is one entry in your organization's list of workplaces. At minimum it has a name - the label your team will recognize, like New York HQ, Bangalore Campus or Remote - EMEA. That name is what appears everywhere a location is shown: on the employee list, in report breakdowns, and in filter menus.
Each location can also carry a small geographic hierarchy that helps larger, distributed organizations stay organized:
- Region - a broad grouping such as North America, EMEA or APAC.
- Country - the country the site sits in.
- State - the state or province.
- City - the city.
These extra fields are optional context. The name is the part that does the work of grouping employees, so give your locations names that are clear and consistent from day one.
Reports read best when location names match how people actually refer to a site. "London" is clearer than "GB-LON-01." And keep the naming style consistent - mixing "NYC," "New York" and "New York HQ" will scatter one office across three buckets in your reports.
Why use locations
Segmenting by geography is one of the most revealing cuts you can make. A company-wide engagement score is an average, and averages hide as much as they show. Two things push a location-level view to the top of most admins' priorities:
- Experience is often local. Manager quality, office facilities, local leadership, commute, even a regional restructure - a lot of what shapes how people feel is specific to where they sit. A low Recognition score spread evenly across every site points to a company-wide policy gap; the same score concentrated in two offices points to something local you can fix.
- Location connects to real decisions. Office moves, hybrid-work policies, regional hiring, and local HR support all map naturally onto locations. When you can show eNPS or participation by site, those conversations get concrete.
Because location is a standard demographic, it flows automatically into dashboards, survey reports, the driver heatmap, and participation tracking - no extra configuration needed once employees are assigned.
Where to find locations
Locations live in your account Settings. From the settings navigation, open the Locations page. You'll see the full list of locations you've created, each with an edit (pencil) and delete (minus) control, and an + Add Location button to create a new one.
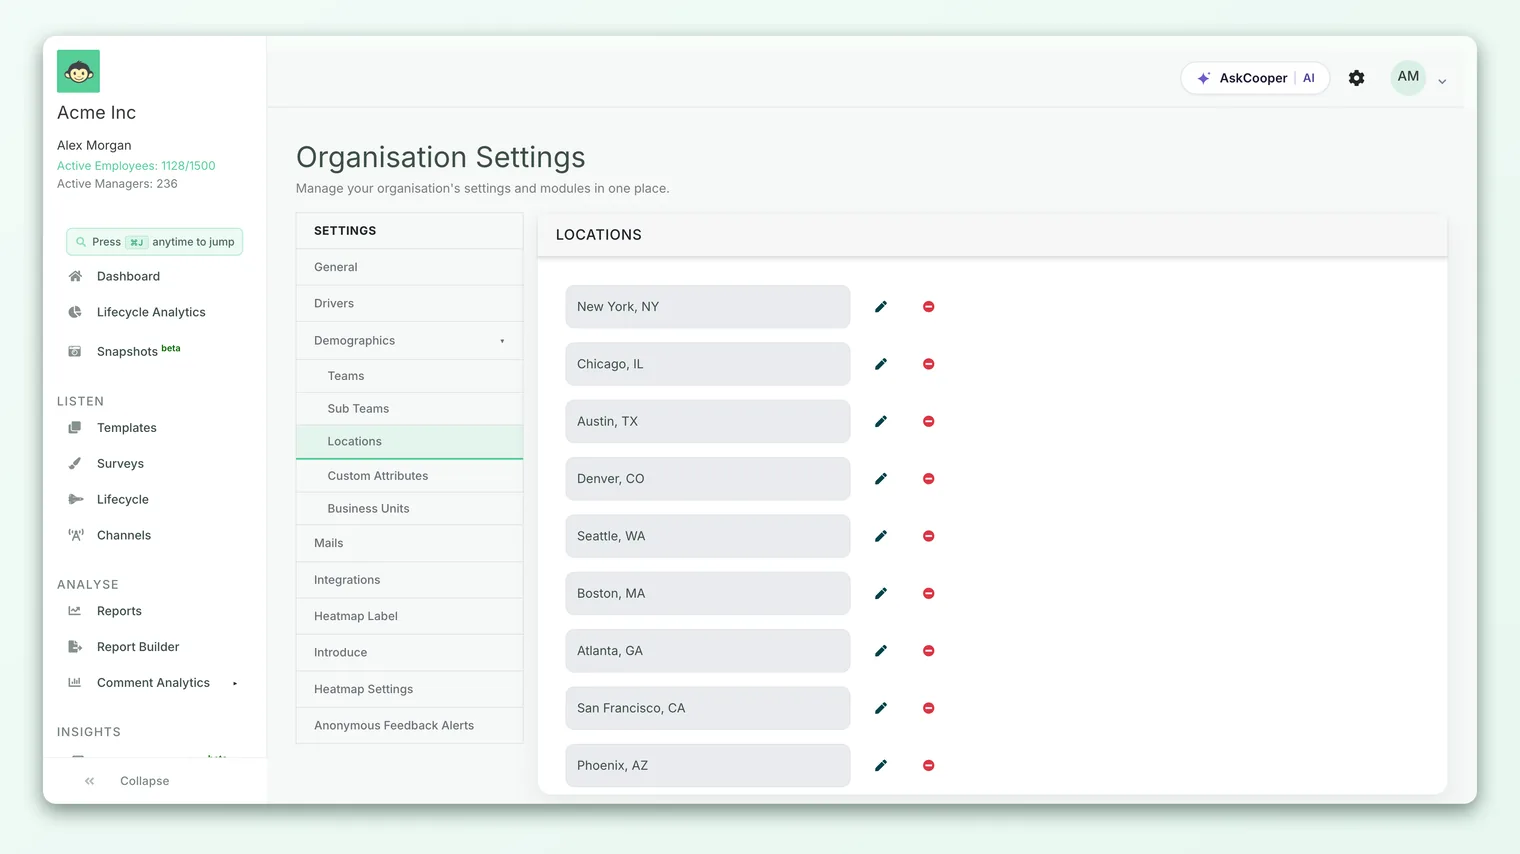
Managing the location list is an account admin task. Sub-admins can be scoped to specific locations - meaning they only see and manage the people at the sites assigned to them - but building the master list itself sits with full admins.
Create a location
Adding a location takes a few seconds:
- 1Open the Locations page - go to Settings › Locations and click + Add Location.
- 2Enter a name - this is the only required field. It must be unique (case-insensitive, so "London" and "london" count as the same) and up to 100 characters.
- 3Add geographic context (optional) - pick a Region, then Country, then State, then City. These dropdowns cascade: choosing a region narrows the country list, choosing a country narrows the states, and so on.
- 4Save - the new location appears in the list immediately and is ready to have employees assigned to it.
If you try to save without a name - or with a name that already exists - CultureMonkey rejects it rather than creating a duplicate, so your list stays clean.
Edit a location
To change a location, click the pencil icon on its row. You can update the name or any of the geographic fields and save. Editing a location updates it in place, so everyone currently assigned to it stays assigned - this is the safe way to fix a typo or rename a site (for example, when "Chennai" becomes "Chennai - DLF").
Editing a location's name keeps its employees attached to the same record. If instead you delete one location and create a new one, you'll need to reassign everyone. When your goal is simply a cleaner label, always edit the existing location rather than replacing it.
Delete a location
To remove a location, click the minus icon on its row and confirm. Deletion is deliberately guarded, because removing a site people belong to could orphan employee records or break historical reports. CultureMonkey will block the delete in two cases:
- Employees are still assigned to it. You'll be told there are employees associated with the location. Reassign those people to another location first, then delete.
- It's linked to existing survey answers. If responses have already been collected against that location, it can't be deleted, because doing so would damage historical reporting. The message notes the location is linked with survey answers.
Once a location has no employees and no answer history tied to it, the delete goes through and you'll see a confirmation.
Assign employees to a location
A location only becomes useful once people are attached to it. Every employee record has a single location field, and there are two ways to set it.
Individually, on the employee form
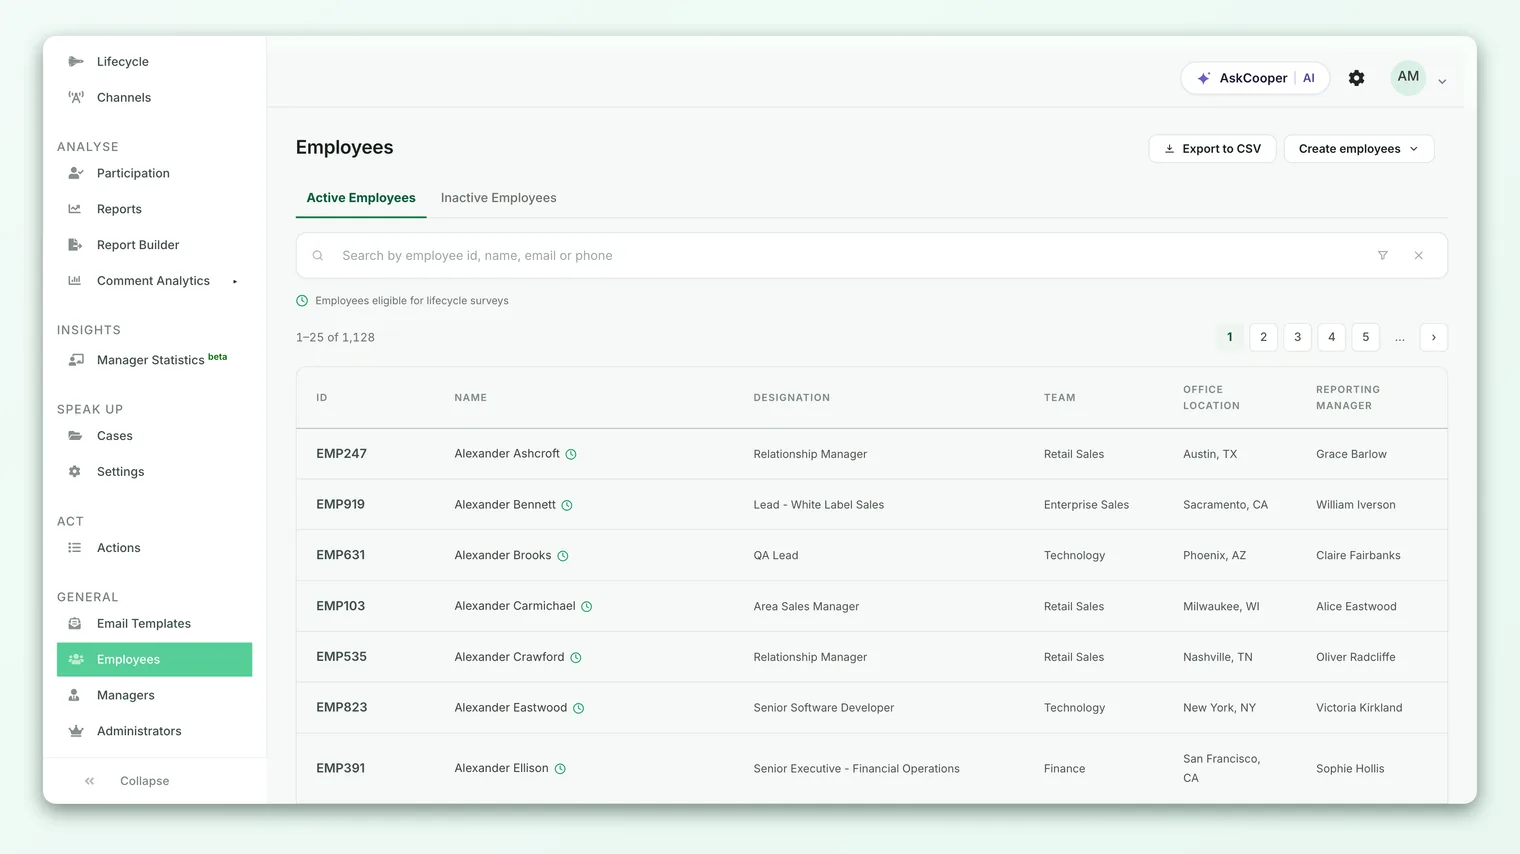
Open an employee from your Employees list and edit them. The form includes a Location dropdown listing every location you've created; pick one and save. This is the quickest route for a new hire, an internal transfer, or fixing a single record. The employee's location then shows in the location column of your employee list.
In bulk, via CSV import
For a first rollout or a large update, the CSV import is far faster. The import template includes a location_name column - put the exact location name for each person on their row. When you import:
- CultureMonkey matches each
location_nameto an existing location (case-insensitively) and assigns the employee to it. - If a name in your file doesn't exist yet, the import can create the location for you on the fly, so you don't have to pre-build every site by hand.
- If a location change is detected for someone who's already in the system, their record is updated to the new location.
Because import matches on the name text, consistency matters: "New York HQ" and "New York" will create or match two different locations. Download the sample template, keep your location names tidy, and preview before confirming. The full walkthrough is in Import employees from a CSV.
If you sync employees from an HRIS (such as BambooHR, Workday or Keka), let that sync populate location rather than editing records by hand - locations carry an external identifier so they can be kept in step with your source system. Manual edits on top of a sync tend to drift.
Using location as a report filter
Once employees are assigned, location is available everywhere results are shown - no setup required. It behaves as a standard demographic (the platform uses demographic and segment more or less interchangeably):
| Where | What location does there |
|---|---|
| Dashboard | Switch the driver heatmap and score breakdowns to view by Locations instead of teams, to see where each driver is strong or weak. |
| Survey reports | Filter any report to a single location, or break a score down location by location - including eNPS and driver scores. |
| Participation | Track response rates by location while a survey is live, so you can nudge the offices that are lagging. |
| Heatmap & complex filters | Combine location with other attributes (for example, location and team) to zero in on a specific cohort, with an option to select all locations at once. |
For distributed organizations, the broader Region and Country fields on a location can also be surfaced as their own report breakdowns when your account is configured for it - handy when you want a continent-level or country-level roll-up rather than site-by-site detail. A full walkthrough of slicing results lives in Filter reports by demographic.
Some organizations choose to hide the location attribute from reports or from free-text feedback - for example, where a site is small enough that showing it alongside a comment could point to an individual. If your account has this turned on, location simply won't appear as a breakdown in those places. It's a deliberate privacy control, not a bug.
Regional considerations
Operating across regions adds a few things worth planning for:
- Anonymity still applies per location. A small office can fall below the anonymity threshold and have its results hidden until enough people respond. Rolling that office up into a broader Region or Country view pools more responses together and often crosses the threshold. See Anonymity and the response threshold.
- Rating tendencies differ by culture. Scores - including eNPS - can be influenced by regional rating habits, so read cross-country comparisons with that in mind rather than treating a gap as purely about experience.
- A "Remote" location is worth having. People with no fixed site otherwise land in an "unassigned" bucket. An explicit Remote location (optionally split by region) keeps them visible and comparable.
- Consistency beats granularity. It's tempting to create a location for every floor and building. Start with the sites you'll actually want to compare in a report, and let the Region/Country/City fields carry the finer detail.
Frequently asked questions
Can an employee belong to more than one location?
No. Each CultureMonkey employee record has a single location. If someone genuinely splits their time, pick their primary site - or model the distinction with a custom attribute instead, which is better suited to overlapping groupings.
What happens to reports if I rename a location?
Renaming edits the location in place, so everyone assigned stays attached and historical results continue to roll up under the new name. This is the safe way to relabel a site - unlike deleting and recreating, which would require reassigning people.
Why can't I delete a location?
Because something still depends on it. Either employees are still assigned to it (reassign them first) or it's linked to existing survey answers (in which case it's kept to protect historical reporting). Clear those dependencies and the delete will go through.
My CSV import created duplicate locations - why?
The CultureMonkey import matches on the exact location name. If your file uses "London" on some rows and "London Office" on others, you'll get two separate locations. Standardize the names in your file and re-import; the duplicates can then be cleaned up once no one is assigned to them.
Do I have to fill in Region, Country, State and City?
No - only the name is required. The geographic fields are optional context that unlock region- and country-level roll-ups and make a large location list easier to organize. Small, single-country organizations can safely leave them blank.
Where to go next
- Group people by department: Add and manage teams
- Group people by division: Add and manage business groups
- Slice results by any dimension: Filter reports by demographic
- Load your people in bulk: Import employees from a CSV
Your feedback helps us improve the Help Center.