

Add jobs and import them from a CSV
Add jobs one at a time or import up to 10,000 from a CSV, and see how jobs link candidates to reports in CultureMonkey.
On this page
In CultureMonkey, every candidate is linked to a job: the requisition they applied for, with its title, location, category and level. You add jobs one at a time from Jobs > Create Job > Add a Job, or in bulk with Import Jobs from CSV, which takes up to 10,000 jobs in one file. Jobs are also created automatically when candidates arrive for a job CultureMonkey has not seen.
Related release: Candidate Experience: bulk job imports and dedicated recruiting email (February 25, 2026). See every dated change on Product Updates.
This guide covers what a job holds and why it matters for reporting, the Jobs list, adding and editing a job, the job CSV import, and how jobs get created by candidate loads.
A job in CultureMonkey needs a Job Title; give it an External ID too, because that is how the API and the job import recognize it. Category, Family, Family Group, Job Profile and Level Hierarchy become heatmap demographics in candidate reports. Import jobs before candidates so candidate loads link to them instead of creating new ones. A job that has candidate history cannot be deleted.
What does a job hold?
| Field | What to put in it |
|---|---|
| Job Title (required) | The role name, for example Senior Data Analyst. The candidate CSV import matches jobs on this |
| External ID | The requisition ID from your ATS. The API and the job import match on this, and it is unique across jobs |
| Location | The requisition location, chosen from your candidate locations |
| Category, Family, Family Group | Your job architecture, for example Analytics, Data, Technology |
| Job Profile | A description of the role |
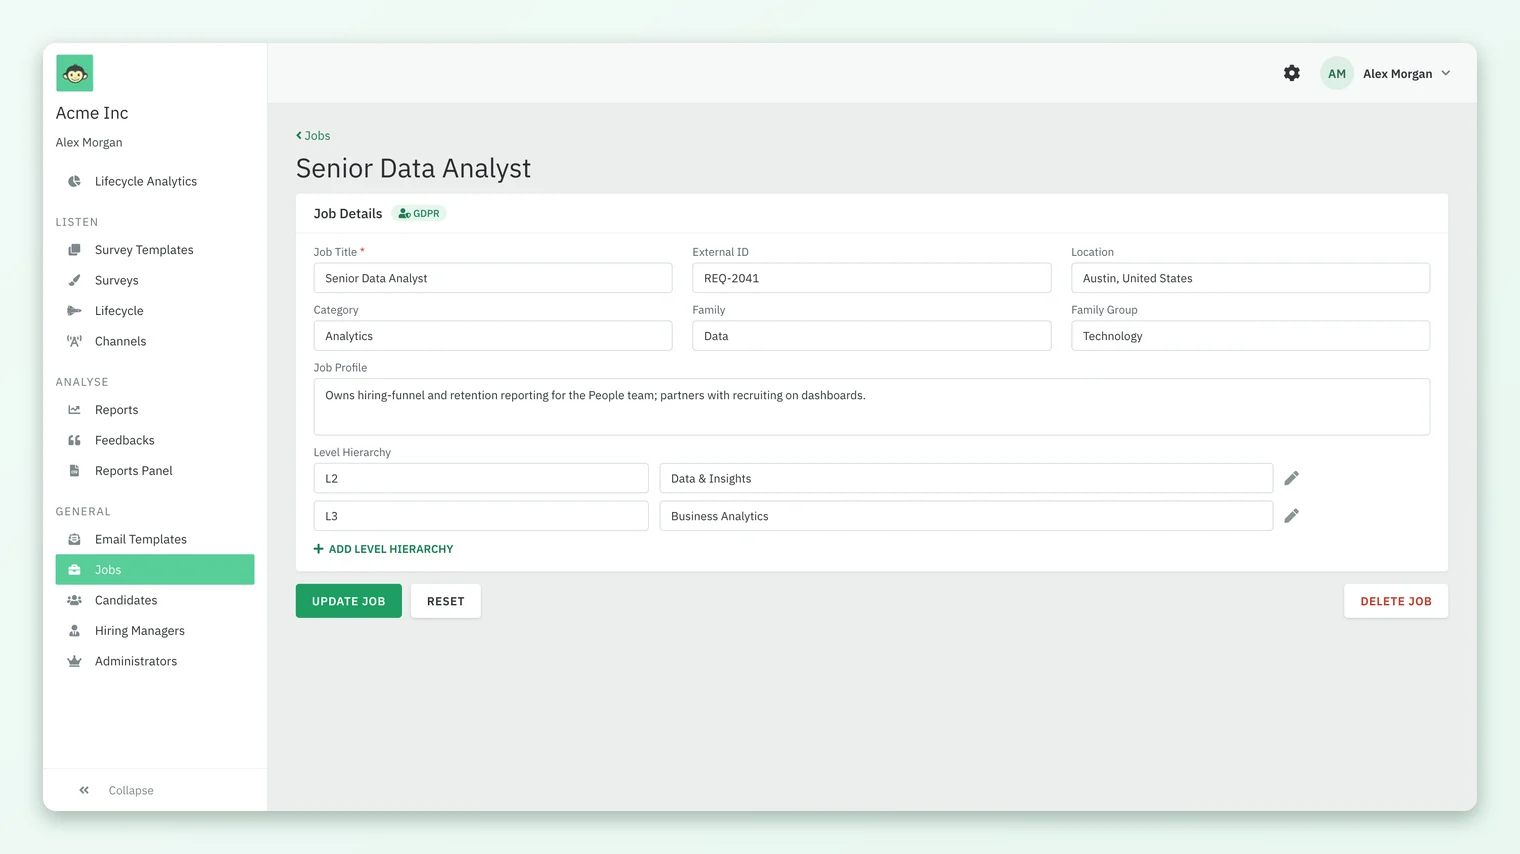
| Level Hierarchy | Pairs of a level and a name, for example L2 Data & Insights and L3 Business Analytics |
Why jobs matter for reporting
- Heatmap demographics. Job, Job Category, Job Profile, Job Family and Job Family Group are standard tabs on the candidate heatmap. Job levels L2, L3 and L4 can be added as tabs too, where CultureMonkey has turned them on for your account (L1 is not offered as a tab). See Use the candidate heatmap, filters and heatmap settings.
- Email placeholders. Candidate survey emails can use
{{job_requisition_title}}and{{requisition_id}}, which is the job's External ID. See Candidate survey emails, placeholders and sender settings. - Sub Admin scope. Where CultureMonkey has turned on attribute-based access, a Sub Admin can be limited to certain jobs or job levels. See Candidate Super Admins, Sub Admins and access.
The Jobs list
Open Jobs under General in the candidate sidebar. The list shows External ID, Job Title, Category, Location and Created At, 25 jobs per page, and each column sorts. Use Search by job title or Add Filters to narrow by Job Title, Category, Family, Family Group or Location. Click a row to open the job.
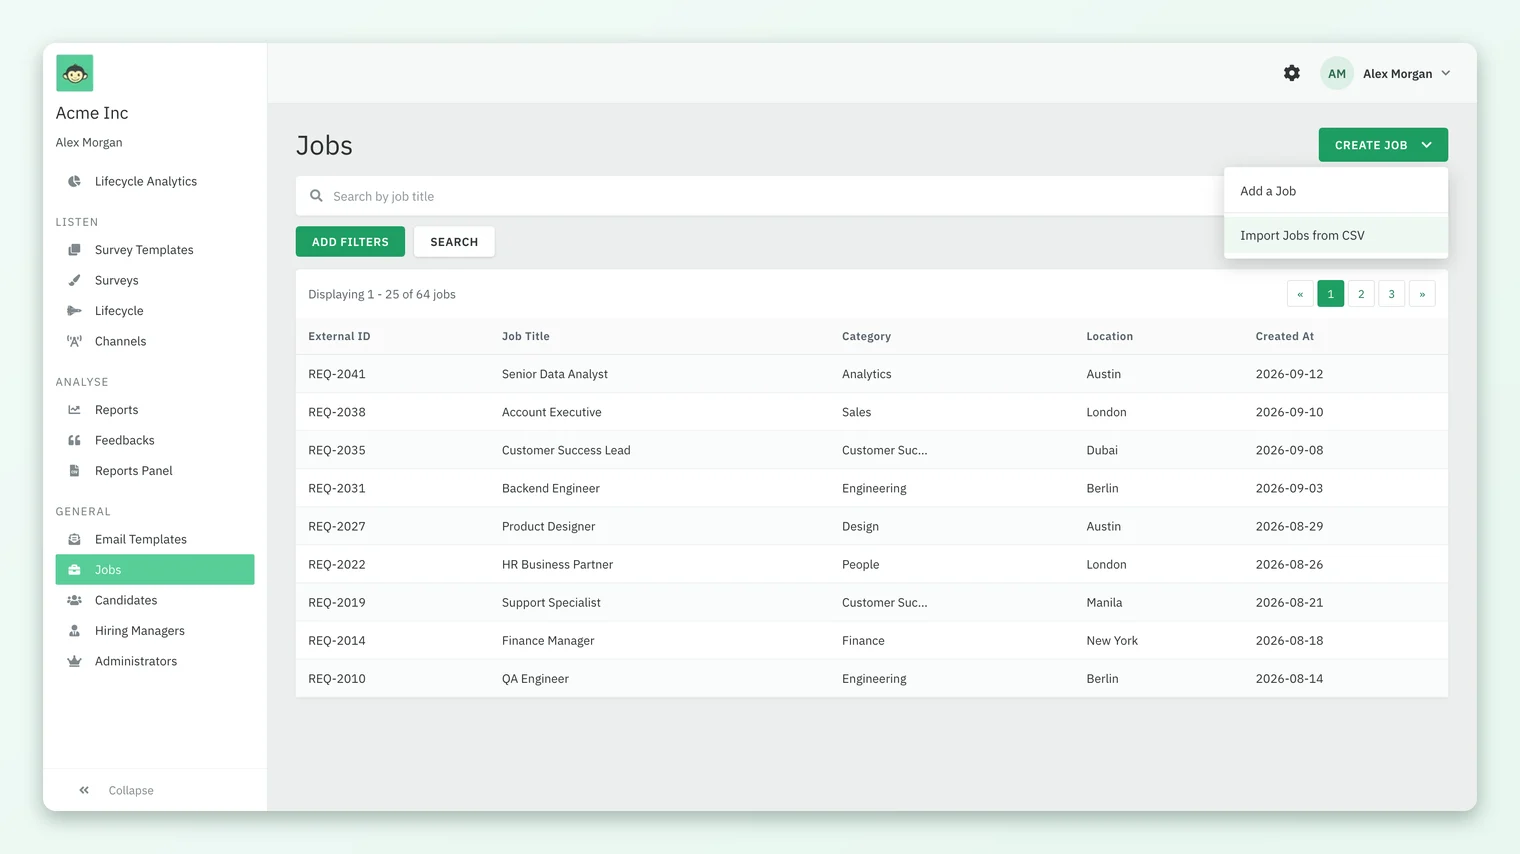
With no jobs yet, the page shows "Currently no jobs in your organization". Sub Admins can open Jobs but only to view them.
Add a job
- 1Go to Jobs, click Create Job and choose Add a Job.
- 2Under Job Details, enter the Job Title and the External ID from your ATS.
- 3Choose a Location, and fill in Category, Family, Family Group and Job Profile as your job architecture needs.
- 4To record levels, click ADD LEVEL HIERARCHY, enter a Level (for example L2) and a Name, and repeat for each level.
- 5Click Create Job, or Cancel to leave without saving.
Edit or delete a job
Click a job on the list to open it, change the fields, and click Update Job. Reset undoes unsaved changes. Use the pencil next to a level to change it.
To remove a job, click Delete Job and confirm "Are you sure you want to delete this job?". A job that has candidate history cannot be deleted; you will see "This job is currently in use and cannot be deleted." In practice, jobs that candidates have been linked to stay in place, which keeps past reports intact.
Import jobs from a CSV
For more than a few jobs, use the importer. It follows the same three steps as the candidate import: 1. Upload, 2. Map Attributes and 3. Preview.
- 1Go to Jobs, click Create Job and choose Import Jobs from CSV.
- 2Click Download Sample Job CSV Template. Its columns are
title,profile,category,external_id,family,family_group,requisition_locationandlevel_hierarchy. - 3Fill in one row per job.
titleandexternal_idare mandatory. Write levels as pipe-separated pairs, for exampleL1:Technology|L2:Data & Insights|L3:Business Analytics. - 4Upload the file (CSV, up to 5 MB and 10,000 jobs) and click Next.
- 5On Attribute Mapping, the Anchor Field is External ID. Pick the matching file header, click Validate, then map Job Title, Job Profile, Category, Family, Family Group, Requisition Location and Level Hierarchy.
- 6Check the first 10 rows on the preview and click IMPORT. The file is processed in the background.
Each row is matched to an existing job by External ID, ignoring case. A match is updated with the row's values; anything else becomes a new job. A requisition location that does not exist yet is created. Rows without a title or External ID fail with "Title is required" or "External ID is required".
View Import History opens the Job Import History table with the same columns as candidate imports: File Name, Uploaded At, Uploaded By, Status, Error File, Total, Success and Error. Download the error file to see why each failed row was rejected, fix those rows and import them again.
How jobs get created by candidate loads
| Route | How the candidate's job is found | If there is no match |
|---|---|---|
| API | By job.external_id | The job is created from the fields in the request. Job fields sent later overwrite the stored ones |
| Candidate CSV import | By job title, ignoring case | A job is created with that title, but without your requisition ID as its External ID |
| Add a Candidate form | You pick the Job Position from existing jobs | Not possible: create the job first |
Import your jobs before your first candidate CSV. The candidate importer matches on title only, so a job that is missing, or spelled differently, is created again without its real External ID and category details.
Frequently asked questions
Is the External ID required for a job?
It is optional on the Add a Job form but mandatory in the job CSV import, and the API finds jobs by it. Give every job its ATS requisition ID so all three routes point at the same record.
Can I export the job list?
No. The Jobs list has search and filters but no export.
Why can I not delete a job?
CultureMonkey blocks deleting a job once it has candidate history, so reports that reference it stay accurate. Jobs with no candidate history can be deleted.
Which job levels appear on the candidate heatmap?
L2, L3 and L4, once CultureMonkey turns job-level tabs on for your account. L1 can be stored on the job but is not offered as a heatmap tab.
Can Sub Admins add or edit jobs?
No. Sub Admins can view the Jobs list and open a job, but only Super Admins can create, edit, import or delete jobs.
Where to go next
- Load candidates next: Import candidates from a CSV in CultureMonkey
- Sync jobs automatically: Send candidates to CultureMonkey with the API
- Slice results by job: Use the candidate heatmap, filters and heatmap settings
- See the whole data picture: How candidate data gets into CultureMonkey
- On the website: Candidate experience ATS integration
Your feedback helps us improve the Help Center.